Sunday, December 19, 2010

Finished Just In Time for Christmas

YoYo Reindeer Card
I have had a busy week finishing up the wrapping, packing and mailing of boxes to send my Christmas gifts off to five different states (Arizona, California, Indiana, Nebraska and Ohio). Then I got to work on wrapping the gifts for my friends at work. Needless to say a couple of the packages I mailed required a homemade Christmas card and although it's hard to make everyone a card I do try to include a little something I have made like the cute little felt gift card holders that came in a kit. This was a wonderful project for me to work on as I watched TV with my husband. It was a little hard to work on when the cat decided to get into my lap but eventually the two of us came to an agreement that she could sit in my lap if she let me sew as she prefers me to sit still while she naps so we compromise - I sit still for a little while as she gets settled down to sleep and then I get to sew. It is actually safer that way for my project as the thread fascinates her and sometimes gets tangled up in her paws with the needle flying into the air!


Felt Gift Card Holders

My mom's December card is the cute reindeer card made with the large oval yoyo's. I love how they turned out and my Cricut Expression machine makes cutting out the letters for the "fa la la la la" a breeze.  The lace Christmas tree card started out with an idea of just sewing the lace back and forth in a very simple squiggly tree shape and then somehow it just evolved into a Victorian type Christmas tree. As the paper and lace sits on my desktop for days as I work with and around it - I have time to say "what if" and "ooh, I like that" and then I start pulling out papers and other embellishments that might give me the design I am looking for.

Lace Christmas Tree Card
Of course after all of my "what ifs" and pulling things out from every nook and cranny in  my craft room it is in shambles!  So today I plan on doing a lot of organizing, cleaning out and putting away so that I can start preparing for the New Year.

Sunday, December 5, 2010

Sew many gifts . . . So little time

This & That Nifty Notes - Holiday Gifts
I don't know about you but I love to give handmade gifts for the holidays, birthdays and any special occassion. However, since I work full-time I don't always get to make as many handmade gifts as I would like.  Sometimes I think it's because I really don't enjoy making the same item over and over and making just one of a new pattern takes a lot of time so I end up having to purchase a gift or gift card.  Recently, I found a pattern that I do enjoy making a lot of, it is a This & That pattern called Little Notes by designer Sherri K. Falls, this can be made in so many different color choices and fabrics that it feels like I am creating a new one each time. On one of the blogs I was looking at I read that keeping your fabrics in the same color family helps save you save time as you don't need to keep changing the thread in your sewing machine.  For this batch of Nifty Note holders I tried that and found it really did save me time! Now the hard part will be deciding who to give one to so as not to hurt anyone's feelings-so if any of my family reads this and would like to have me make them one just send me an email with the colors you would like it to be made in and I will try my best to get you one made in the near future. These really do not take a whole lot of time once you decide on the fabrics and get them cut out - I had four ready to be assembled so that is what I spent last weekend doing which is why I didn't get anything posted.  I enjoy the blog but I'd really rather be crafting.

Inside the Nifty Notes note keeper
Here is a picture of the inside of the This & That Nifty Notes.  A very wise person I know suggested I take more photos to should show more of the details so they can really see what the whole item looks like.  I agree.

If this looks familiar to you, I did make one of these for my mom using fabric dyed with different teas.  The one I made for me I added a loop to hold one of the wood pens my husband turned for me.

Sunday, November 21, 2010

Things Thanksgiving Part II

Owl YoYo Card

Thanksgiving Postcard Card

Whew!  I barely finished my cards on time to get them in the mail on Friday.  Actually I fixed up a couple of goodies and put them inside one of the USPS flat rate boxes and then added the cards to the box. For me it is as much fun to send goody boxes as it is to receive them.  My mom always use to send me fun little items in the mail (she still does, just not as frequently as she used to). She always wraps whatever it is in wrapping paper or tissue paper and adds a pretty bow or sticker. I never knew what would be waiting for me inside the box but I was always excited to get one as I knew it would be fun. I'm hoping when she receives the box from me that she feels in a small way that I have come to visit her.

The card I made for my mom this month is of an owl using an old sweater vest that I have been waiting to repurpose, some felt and of course a couple of yoyo's. My inspiration for the card came when Don and I went out to breakfast at the Cracker Barrel restaurant and I saw this cute cutlery holder in the shape of an owl.  It's eyes were made using gathered ribbon and my husband remarked that it would look good with yoyo eyes - and that was it - I knew I had to try it. 

You may also remember from last week I was concerned that I didn't have enough time to finish the Thanksgiving postcards, well, inspiration struck and I used some double-stick fusible web to add the postcard fabric to a card.  I love the way it turned out and think I am going to make a few more this way too.

Things I am thankful for today: my husband and family, friends, the spectacular colors of the fall leaves, the little chipmunk that visits my backyard and the fun I get from being creative.  What are you thankful for today?
Sunday, November 14, 2010

Things Thanksgiving

Thanksgiving Fabric Postcards
It always seems that no matter how much I try to be prepared for the holidays they always catch me unawares.  A couple of years ago I found this great fabric panel with these wonderful pictures and sayings for Thanksgiving.  I was so excited as I thought wow these will be so easy to embellishment with either hand or machine stitching and then send out to my family.  And here we are today (a couple of years later) and I have only managed to complete two of them. I was so tempted the other day to donate or toss out the others that still need to be embellished and put together but something inside me said "someday, someday you'll have time to finish these", so I put them back in my box for another some day.

2006 Turkey Fruit Carving
As you may be aware I like to be organized with my pictures, crafts, cabinets, etc but I find that sometimes my organization will just "explode" in all directions - probably a result of over thinking it.  Anyways, this happened recently to my digital photos as I got a new computer this year and transferred them over from my old computer into new file folders labeled by year and then activity. What I didn't take into account, but remembered later, was Don had some pictures on his computer too and when I went to check to see what I was missing I came across the Turkey Fruit Carving he had made in 2006.  I was so excited to find it as I wanted to put the picture in the same file folder as his sailboat fruit carving. I still have photos I am looking for and I also would like to scan my hard copy photos to my computer plus save them to a disk or USB drive but that will have to wait for a while.  For now I am still trying to finish up my UFO's.

Sunday, November 7, 2010

My YoYo Bowl

YoYo Bowl
I don't know where the idea came from or what the inspiration might have been but a few months ago I decided to sew lots of yoyos in a variety of batik fabrics using the extra small Clover yoyo maker to make a fabric yoyo bowl. The batik fabrics are a joy to work with especially in the smaller yoyos as they do not "bulk up" at the part where they turn under, and the fabric is very soft to the touch. Originally I had the bowl sitting flat without any legs, then I thought I might make it "feet" using my extra yoyos (I always have extra yoyos as they are great to have around just waiting for the next inspiration). The feet looked good but it was just a little bit too much the same and seemed to all blend together.  Then as I was in the midst of de-cluttering I came across this stand I had purchased years ago, its original purpose was to hold a seashell but as you can see it is very versatile and made the perfect stand for my yoyo bowl.

Sunday, October 31, 2010

YoYo Dogs & Cat


Tamara's YoYo Puppy for Her Mom

My Brown & White Puppy

My granddaughter from Arizona visited me a couple of years ago and while she was here we went to one of my favorite quilt shops, Quilting Adventures. While looking through the store she saw the Indygo Junction pattern for this yoyo puppy. She really wanted to try make making one for her mom so together we looked for the fabric she wanted to make her puppy out of and made our purchase. Once back home I showed her how to use the Clover YoYo Maker to make the yoyos. She caught on really quick and in the evenings or anytime we were just hanging out watching TV (I learned a lot about Hannah Montana) she would sew the yoyos for her puppy and I would sew the yoyos for the puppy I was making. This was a really enjoyable and relaxing time. Soon it was getting close to the time for her trip to end and the puppy still needed to be assembled.  Things got a little crazy but we managed to finish it in time for her to take back home to give to her mom.  After she was back home I finished assembling my yoyo puppy. I really enjoyed being able to share my love of sewing and spend this time with my granddaughter.

Once I made the puppy I just knew I needed to make the kitty cat pattern too.  I wanted the cat to look like our orange tabby cat (MacTavish aka Ru) so I chose fabrics that would help depict his coloring and personality.  Our buddy Ru passed away earlier this year and it left a huge hole in our lives, I am so glad I made this wonderful yoyo kitty as it always reminds me of our very remarkable cat. As you saw in one of the earlier blogs we have a new tabby cat and I have already picked out my fabric  to make a yoyo kitty in gray and white. Boots body is mostly grey with a little brown and all four of her paws are white which is how she got her name.


YoYo "Ru" Kitty


Sunday, October 24, 2010

YoYo Pumpkins for Halloween


YoYo Pumpkin-pattern by Indygo Junction
I'm on a mission this year.  Actually, it started around the beginning of summer as I looked around my craft room and saw so many unfinished projects, which conflicted greatly with the other projects I either wanted to start or purchase.  For me it all seemed like "chaos & conflict". My solution was to weed out any project I absolutely was not going to do, set aside some projects for repurposing, and slowly complete projects that just needed a little bit of time.  The yoyo pumpkin by Indygo Junction  I had started in 2008. All the yoyo's had been sewn and all it needed was for me to sit at the sewing machine for a half-hour to sew his little body together,and then finish stuffing and adding hand sewn details in the evening. He is so cute - it makes me wonder now why I took so long to get him finished?


YoYo Pumpkin and Bats 2010

YoYo Pumpkin & Crows 2010

There were two left over yoyos from the pumpkin (I had sewn them just in case) so I decided I would make  a couple of Halloween cards with them.  With my plan in place I started pulling out me my blank cards and orange and black papers.  I found in my stash of ribbons one with Happy Halloween and bats on it and then I looked at my Cricut cartridges and I found one with a Halloween bat design. Last year I had pre-cut some paper crows in different colors so I pulled those out to use and then got to work.  The Autumn pumpkin yoyo card is mom's card of the month and this time the other yoyo card will go to my sister Mary. I hope I'm not offending my other two sisters - it is so hard to keep a balance - but I need to go with my heart, instincts, or that tiny voice that just speaks to me saying "make this one for . . . ".


2006 Thanksgiving YoYo Card

In 2006 I had made my mom a Thanksgiving card using a yoyo pumpkin on the front.  This card is a little more detailed as the scarecrow is made with eyelets that allow him to move.  I saw the pattern for him in one of my books and thought he was so cute I just had to make him.

Sunday, October 17, 2010

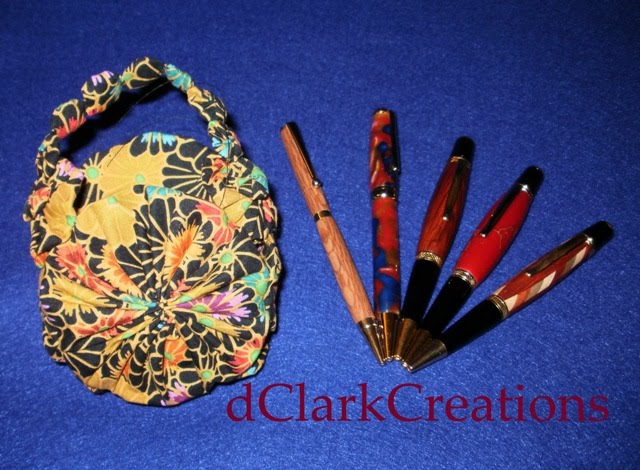
Pink Ribbon Pens

Each year Don's work hosts a Pink Ribbons of Hope Tennis Tournament to benefit breast cancer. Since 2007 when Don started wood turning and making pens he has donated a pen for the Silent Auction.
2010 Pink Ribbon Silent Auction Pen
This year's pen is a Wall Street Rose Inlay pen which turned out beautiful


2009 Pink Ribbon Silent Auction Pen

In 2009 Don turned an American Slim Pen with Tennis Racket Clip. Finding the tennis racket clip was a bonus.


2008 Pink Ribbon Silent Auction Pen
We had a busy year in 2008 but Don still managed to get this pen made.  Again, it is another American Slim Pen.
2007 Pink Ribbon Silent Auction Pen


Here is Don's first pen he donated in 2007 for the silent auction. It is made with a pink/red colored wood (type unknown).


No matter how busy Don's schedule is he enjoys being able to contribute to charity by doing something he loves.


Sunday, October 3, 2010

YoYo Cupcake Birthday Card

YoYo Cupcake Birthday Card
Whenever possible I love to use yo-yo's in my card designs. This month for my mom's birthday I used the yo-yo as the topping on the cupcake and then added a paper cherry and candle.

Sunday, September 26, 2010

Saturday Play Date

Yesterday, Connie and I got together for another of our play dates. The theme for this one was paper dolls but we sort of went on our own creative bent which totally worked out for the both of us. These play dates are so much fun as we get so immersed into our projects that we lose track of time. What a great way to spend a Saturday!

Here is a photo of my paper doll design using Connie's piece she did earlier in the month from Julie Nutting's project in the latest issue of Somerset Studio magazine, as my inspiration. 

For my canvas I covered a used binder with old newspaer clippings my mother had given me of various tips and hints for projects as well as crochet directions that I will never use, as I don't crochet, but with this project  I did get a chance to repurpose them. My paper doll is still a work in progress as I would like to add a few embellishments to her dress but I was quite pleased with my results during our "play date". Once finished I plan on using my binder to hold all of my craft magazine clippings.