Saturday, December 7, 2013

The Tagua Nut


Tagua Nut Necklace
While browsing at Wood Craft Don saw a package of Tagua Nuts and thought he would like to see how he could use them on his lathe. In experimenting on how best to mount one of the nuts for turning he glued the nut to a piece of wood.  Next, he decided he would cut off the outer layer to see what the nut looked like on the inside.  Well, he made several thin cuts working his way down to a piece he felt could be turned. 

Not wanting to waste the tagua nut slices Don asked me if I could think up a creative use for them.  As I looked at the slices my mind saw a "pear shaped" piece and immediately I knew I was going to make a card with it. 
Mom's June Card-Tagua Nut Pear


It wasn't until we were browsing in the craft store that the idea came to us to make a necklace with the tagua nut.  So we purchased the jewelry findings and Don drilled a very tiny hole at the top of the nut to attach the necklace holder and the final step was to add the sterling silver chain.  The fun part about the tagua nut necklace is that no two necklaces can be the same due to the shape of the nut.


Mom's July Card using tagua nut and wood shavings
So far Don hasn't turned the tagua nut on his lathe but I'm sure one of these days it will make it there.  In the meantime I continue to use the slices in my cards and Don has a list of family members to make necklaces for.

P.S. I love how the lambs head turned out.  All it took was a black Sharpie marker to draw the eyes, nose and mouth. The  body of the lamb is made with wood shavings and I used felt for the hooves.


Sunday, September 22, 2013

June Birthday Card

Birthday Candle Card for Linda - June 2013
In my last post I mentioned that the Spring/Summer 2013 issue of Make It Yourself magazine had a lot of card projects using bakers string (or twine as some call it). 

Another of their projects I liked were the candles made using the twine.  Like many of you I have someone in the family having a birthday every month of the year which is quite a challenge to try to make a card for each and every one of them - my solution is to try to alternate it so at least every other year they receive a homemade card but a few lucky family members seem to get one yearly. 

Making the twine candles was a little more challenging than I expected but the end product was well worth it.

Hot Air Balloon Thank You Card

Hot Air Balloon Card May 2013

For my trip to California to visit my mom and sisters for Mother's Day I purchased the Spring/Summer 2013 issue of Make It Yourself magazine to read on the plane. It had a lot of card projects using bakers string which is a product I had wanted to try creating with. One of the projects that really caught my eye was the hot air balloon card.  When I got back home I quickly got busy making it using the pattern and direction from the magazine.  It was the perfect thank you to send to my sister for her hospitality.  It was also a fun card to make and I love how it turned out - I hope you do too.


Monday, September 16, 2013

Happy Mother's Day!

It seems strange to be writing about Mother's Day in September but I'm still trying to work my way chronologically to date.  A year is a long time to catch up on but I'm determined and will keep posting away until I am caught up.


Butterfly Mother's Day Card 2013
Here is yet another style of card using the paper napkin technique and some micro beads to make this year's Mother's Day Card.  It seems that last year for Mother's Day I made mom a butterfly card too.   To see last year's card go to Paper Cards and scroll down to May 2012.

Sunday, September 15, 2013

Flock of Yo-Yo Owls

Birthday Owl for Granddaughter  and Mother's Day Owl
Birthday Owl for Sister
While browsing through a Mary Maxim craft catalog I saw these very bright and cute yo-yo owl kits.  As you know I love making yo-yo's so I purchased the kit.  Once it arrived I quickly got busy making the yo-yo's for the body. Once those were finished I started on the wings and horns but I did not like the "raw" technique the pattern directions gave.  So instead of just folding the wings in half and sewing a running stitch I ironed under about 1/8" of the wing edge then I folded the wing in half and completed it with the running stitch.  For the horn's I used some fusible webbing to adhere a bottom piece of fabric which gave the horns more body so they stood up better. 


Thank you Owl for Eldest Sister

The yo-yo's for the owl's body is a great way to use up those smaller fabric scraps which is what I did for the two brown, white and beige owls. At the craft store I purchased the wood base, spool, dowel, chenille stems and  glue on wiggle eyes and used my pattern and instructions from the kit to make owls using up fabric in my stash. As soon as I get some more time to go through my fabric I'm going to be making a few more owls.
 
What a "hoot" everyone had opening up their gift and I had a "hoot" making them!


Saturday, September 14, 2013

Getting Back to Woodturning


Wood Turned Goblet - May 2013
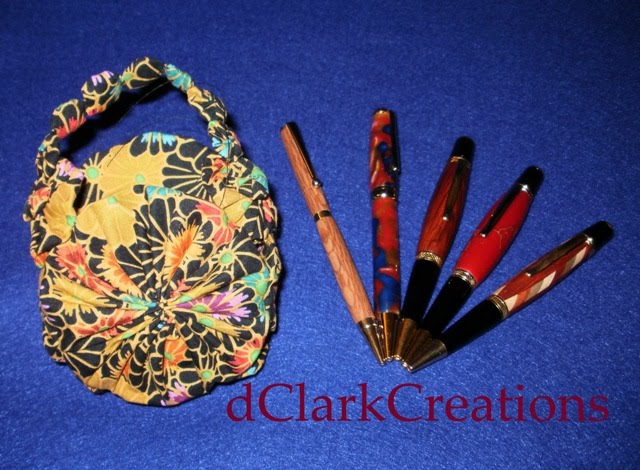
My dilemma this morning was do I try to get a better photo of the goblet Don turned or do I get on with continuing to catch up with my posting.  I chose to catch up with the posting but the photo does not do justice to the goblet. Now that Don is retired he is having fun branching out and turning more than just pens.  Since May he has experimented with Tagua nuts, Banksia pods, finishing techniques and new styles of pens which I will be posting about in the very near future.

Stay tuned for more of "As the Wood Turns". . . .

Sunday, September 8, 2013

HELLO Card for April

Mom's April Card
This card was fun and quick to put together which was a very good thing as I was also in the process of making two yo-yo owls as gifts (you'll get to see those in another post) and getting ready to go cross country to see my mom for Mother's Day.

Using pre-printed card stock, ribbon, silk flower petals, a button, and some alphabet letters, I was able to finish this card in a short amount of time. Again I was lucky that I had everything on-hand especially since my craft room is bulging at the seams!

Saturday, September 7, 2013

Blooming Yo-Yo Trees for March

Blooming Yo-Yo Trees - Mom's March Card

This card was fun to put together.  The yo-yo tree tops have pink French knots for blossoms, I free cut the tree trunks and used my Cricut to make circles which I cut in half to make the hills.  With some blue paper the sky was created and then by adding a strip of yellow paper pre-printed with "Spring Time" and a yellow bow the card was complete.


Fun fact: I had all the materials on hand and didn't need to purchase any supplies.  The yo-yo's were leftover from another project so all I had to do was embellish them with pink French knots.

Monday, September 2, 2013

Valentine Yo-Yo Card for Mom
As I'm catching up and posting cards and gifts I've made this year what I'm noticing is 2013 is my year for gathering inspiration from the craft magazines I have collected, saved, and newly purchased. Each month seems to go speeding by so quick that for me there is little time to play and come up with new ideas but I've truly had fun making my version of a craft I've seen and really liked.  It is my hope that you are enjoying them too and many thanks to those who have provided me with inspiration.

This Valentine card is made using red card stock, six white yo-yo's, and some white fuzzy pom-pom trim I found at one of the local craft stores. I cut the leaves using my Cricut machine.


Trio of Yo-Yo Cardinals

Trio of Yo-Yo Cardinals 2012
Sometimes I see Yo-Yo kits (usually in the Mary Maxim catalog) that are just too cute not to buy and make. The kit had materials to make six cardinals.  Three I used as Christmas gifts and three I kept for myself.  As you can see each little yo-yo cardinal has a personality all its own.


Sunday, September 1, 2013

Cupcake "surprise" Box

Sweet Cupcake Box
For me giving gifts is a lot about the presentation - I grew up in a family who are all creative in their own ways and I have very fond memories of the gifts I received that were cleverly packaged. So it is just natural for me to continue to "pass it forward" to my family, children, grandchildren and friends.  Our grandkids are also very creative and they all enjoy receiving homemade gifts. So for our granddaughter's birthday I used my Cricut and the "Sweet Tooth Boxes" cartridge to make this cupcake holder that held a fabric embellished cupcake with a little money tucked inside!  Instead of a typical birthday card I went with the cupcake shaped tag.

To date this is the only box I've made using the "Sweet Tooth Boxes" cartridge but I hope to be able to sneak in some time to make some of the other boxes for Christmas this year

Fun Winter Yo-Yo Birds

Tweet Yo-Yo Winter Bird  January Card for Mom
First off let me tell you I got my inspiration for these cute yo-yo birds from Crafts n Things magazine. It was in their winter issue 2012 they had directions for making this bird out of almonds.  After reading their directions I realized I didn't have the patience to make their almond version but as I was looking at the picture my eye also landed on one of my oval yo-yo's and the "ah-ha" moment hit me!  I could make this bird using almond colored fabric and my oval yo-yo maker.


Yo-Yo Winter Bird Card II
The branch and "Thinking of You" saying was cut out using my Cricut machine.  The birds hat is made out of felt with a pom-pom at the tip. The feet are made of brown covered wire and I used black beads for the eyes and a small piece of felt for the beak. This fabric version of the bird was so easy to make that I made a second card for one of my sisters.


Sunday, August 25, 2013

Yo-Yo Gingerbread Man Card

Yo-Yo Gingerbread Man 2012
It was fun putting together this little yo-yo gingerbread man especially as this was one of my favorite story books when I was a child.  I always loved that he outran the fox but wasn't so fond of the alternate version where he gets eaten. 

To create the yo-yo gingerbread man I used both the oval and circle Clover Yo-Yo makers. Small brads were used to make his arms and legs movable, a little rickrack, a few buttons, a couple of beads for the eyes and some ribbon completed his look. Like most Christmas's I was running out of time to get the card mailed to my mom so I used the Merry Christmas sticker I had on hand.  Looking back that is the one thing I would definitely change as it was a little to shiny to go with the rest of the card.


Sunday, August 18, 2013

Time for Autumn Leaves and Turkey

2012 Turkey Napkin Card
2012 Autumn Leaf Card
I love collecting leaves in the fall and collect quite a few while out walking the dog.  I sent the leaf card to my sister in California as she doesn't get to experience the fall colors the way that I do and I wanted to share a little bit of the season with her. 

Since learning how to make cards with napkins and plastic wrap when I saw this napkin with the turkey on it I just had to turn it into a card for my mom.  A little gold glitter makes this turkey really stand out!


Remember the Apple Salad Hot Pad?

With the pieces left over from making the Apple Salad hot pad I finished the satin stitch edging and attached it to card stock to make the October card-a-month for Mom.  Apples and fall just seem to go together.

Apple Salad Card

Picking Up Where I left Off - September 2012

Layered Fall Flower Card Nov. 2012
I know a lot of you are just like me with multiple projects and activities going on and sometimes it is just hard to get back to blogging. But I have found that it is one of the best ways to share with our friends and family our creative endeavors.  Lately it has been just about getting that one card-a-month made for my mom.  Here is the September card from last year.  I promised my husband I would catch up on our blog as he is my number one fan and supporter and since he is now retired I will be posting a lot more of his projects too.